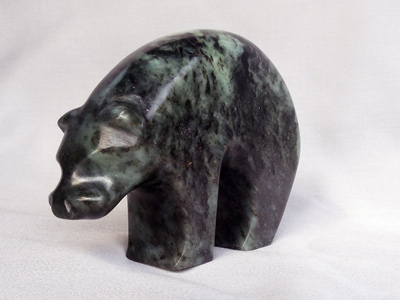
My Anishinaabe friends call this the "Good Luck"
bear. The closer the legs are together, the more luck they will
bring.
The tools that are required to complete this carving
are a hacksaw or hacksaw blade, a round file and a flat rasp.
Later for the sanding and polishing, you will require Waterproof
Silicon Carbide Sandpaper and Linseed Oil or Bee's wax..
1. For this carving you
require a piece of stone that is 3 inches by 4 inches by 1 inches.
Like the one shown at the left.
Draw the pattern
on the stone and cut out with a bandsaw, as I have done, or use
a handsaw.
2. The cut out Form
3. With a small round file,
mark behind the ears. (1 1/4 inches from the nose) Hopefully
this will remind you not to file them off when filing the back.
4. Round back with rasp.
Work away from the ears.
5. Another view
6. Round stomach using
small half-round rasp or large round rasp.
The rasp shown here is a Habilis half-round rasp.
7. Angle the front of the
face to form the muzzle with the flat side of the rasp . Leave
about 3/4" to 7/8" in the front for the muzzle. Another
view can be seen in step 9.
8. Shape neck with small
half-round rasp or large round rasp.
The rasp shown here is a Habilis half-round rasp.
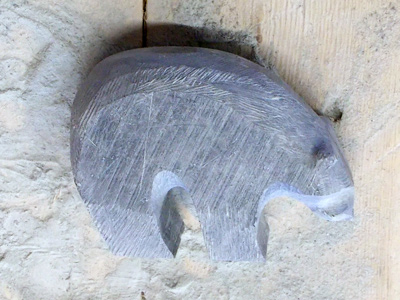
9. Mark width of feet with
a pencil. About 1/16" or 3/32" of each side should
do.
10. Rasp down feet at an
angle as shown in the picture.
11. Create the hollow for
the eye using a large roud rasp.
12. This picture shows
the angle for the eye hollows.
13. Mark the front of the
ears. From the front of the ears, shape the forehead.
14. Bring the neck line
dowbn to the chin.
15. Join the eye hollow
to the neckline
16. Form the nose and muzzle
17. Remember that when
you are sanding the carving you are removing stone. Leave enough
stone that you can sand to the final shape.
18.
19. Cup the ears and you
are ready for sanding. Sanding
Page
20. The sanded carving.
21. The polished carving.
I hope you have enjoyed carving the "Good Luck"
Bear.
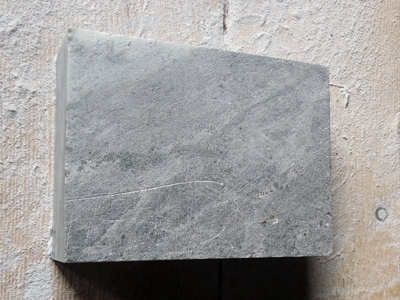 1. For this carving you
require a piece of stone that is 3 inches by 4 inches by 1 inches.
Like the one shown at the left.
1. For this carving you
require a piece of stone that is 3 inches by 4 inches by 1 inches.
Like the one shown at the left.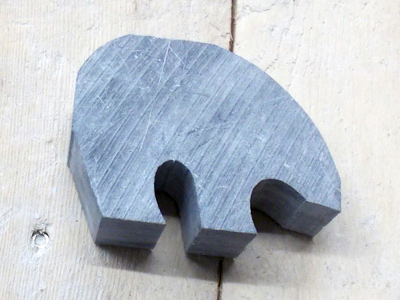 2. The cut out Form
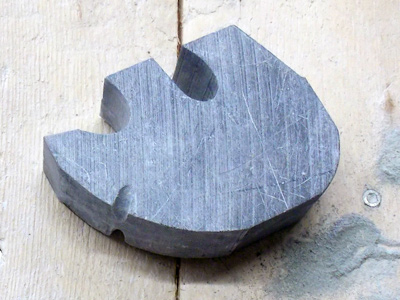 3. With a small round file,
mark behind the ears. (1 1/4 inches from the nose) Hopefully
this will remind you not to file them off when filing the back.
3. With a small round file,
mark behind the ears. (1 1/4 inches from the nose) Hopefully
this will remind you not to file them off when filing the back.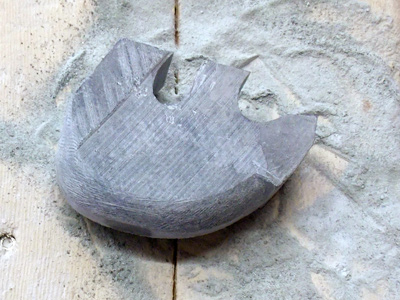 4. Round back with rasp.
Work away from the ears.
4. Round back with rasp.
Work away from the ears.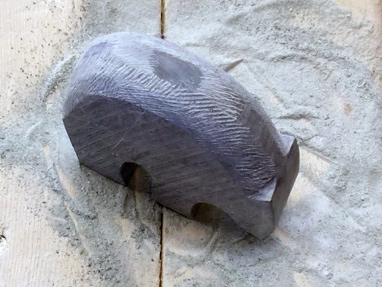 5. Another view
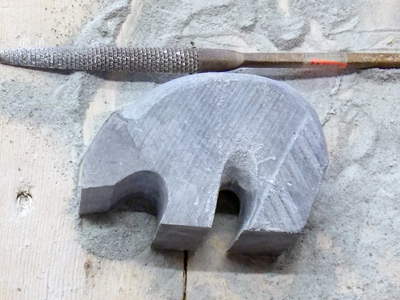 6. Round stomach using
small half-round rasp or large round rasp.
6. Round stomach using
small half-round rasp or large round rasp.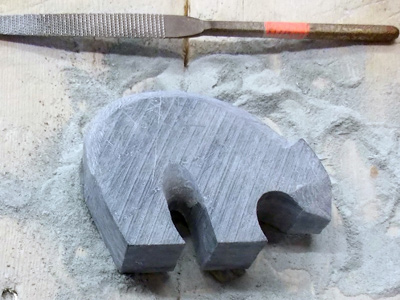 7. Angle the front of the
face to form the muzzle with the flat side of the rasp . Leave
about 3/4" to 7/8" in the front for the muzzle. Another
view can be seen in step 9.
7. Angle the front of the
face to form the muzzle with the flat side of the rasp . Leave
about 3/4" to 7/8" in the front for the muzzle. Another
view can be seen in step 9.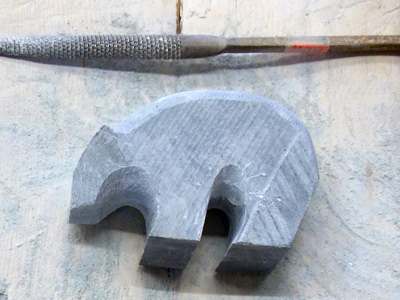 8. Shape neck with small
half-round rasp or large round rasp.
8. Shape neck with small
half-round rasp or large round rasp.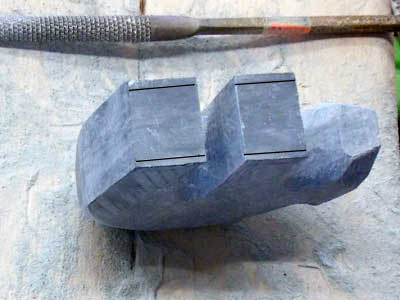 9. Mark width of feet with
a pencil. About 1/16" or 3/32" of each side should
do.
9. Mark width of feet with
a pencil. About 1/16" or 3/32" of each side should
do.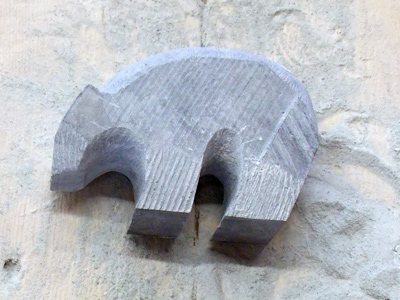 10. Rasp down feet at an
angle as shown in the picture.
10. Rasp down feet at an
angle as shown in the picture.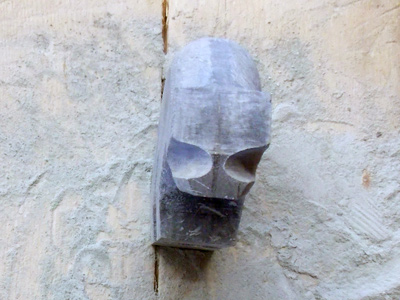 11. Create the hollow for
the eye using a large roud rasp.
11. Create the hollow for
the eye using a large roud rasp.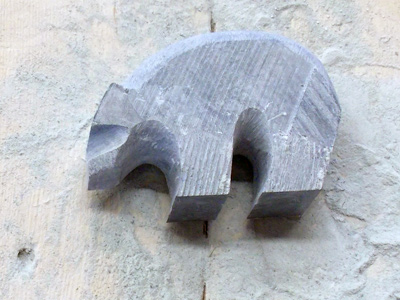 12. This picture shows
the angle for the eye hollows.
12. This picture shows
the angle for the eye hollows. 13. Mark the front of the
ears. From the front of the ears, shape the forehead.
13. Mark the front of the
ears. From the front of the ears, shape the forehead.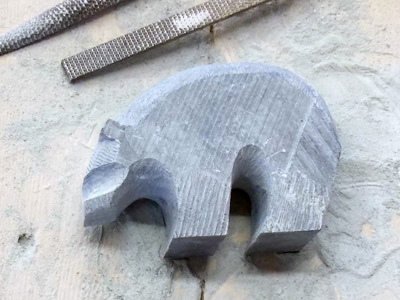 14. Bring the neck line
dowbn to the chin.
14. Bring the neck line
dowbn to the chin.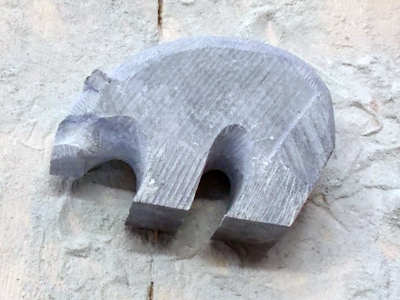 15. Join the eye hollow
to the neckline
15. Join the eye hollow
to the neckline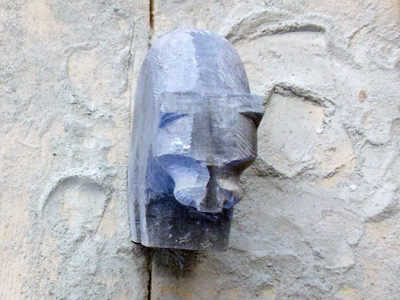 16. Form the nose and muzzle
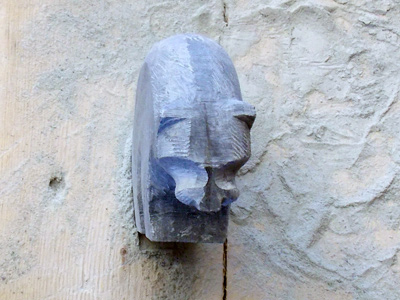 17. Remember that when
you are sanding the carving you are removing stone. Leave enough
stone that you can sand to the final shape.
17. Remember that when
you are sanding the carving you are removing stone. Leave enough
stone that you can sand to the final shape.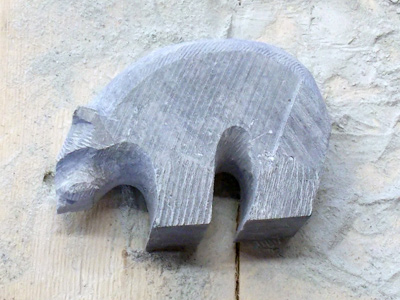 18.
18. 19. Cup the ears and you
are ready for sanding.
19. Cup the ears and you
are ready for sanding. 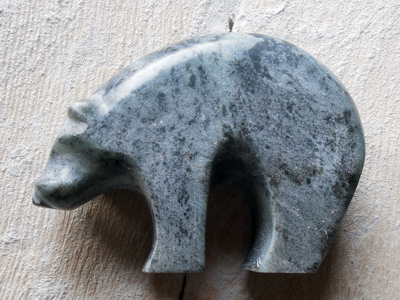 20. The sanded carving.
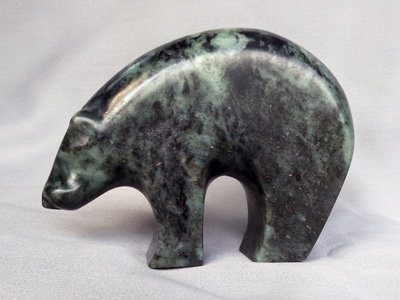 21. The polished carving.